Today on Repairs101 we’re going to fix a very common problem in the bathroom a bathtub’s leaking tap. We’ve got a real dripper on our hands. Take these apart, show you what’s inside but of course first a quick trip to the basement to find the valves to shut off the water. OK as you can see these old valves are quite sticky. We’ll just turn this one down as well. And while we’re here do a quick inspection and we can see we’re in trouble – there’s some kind of rust pattern forming here on the paint indicating that this elbow needs to be replaced.

OK we’ve been down to spider-land and back and the water’s still gurgling but we’ll just release the pressure and see if that doesn’t … These are wide open and there’s still a little gurgle going on so what that indicates to me is that those valves downstairs aren’t doing their job anymore either. OK well you saw me turn off the valves that supply these valves with water. But what you didn’t see is that those valves leaked so these valves were still leaking so I had to go to the valves that control those valves and… so this is a pretty old house, it was built in nineteen-forty and it seems all the valves are all dried out and I had to turn off the water to the house.
OK we’ll just start by popping off these covers giving us access to the inside. OK so just take a regular screwdriver and pop it off. Look inside: Phillips head screwdriver. So I’m just going to unwind these, get the handles off. Oh that’s tight. OK, I heard it crack, that’s satisfying. Now as you can see we can access the valve stem bodies.
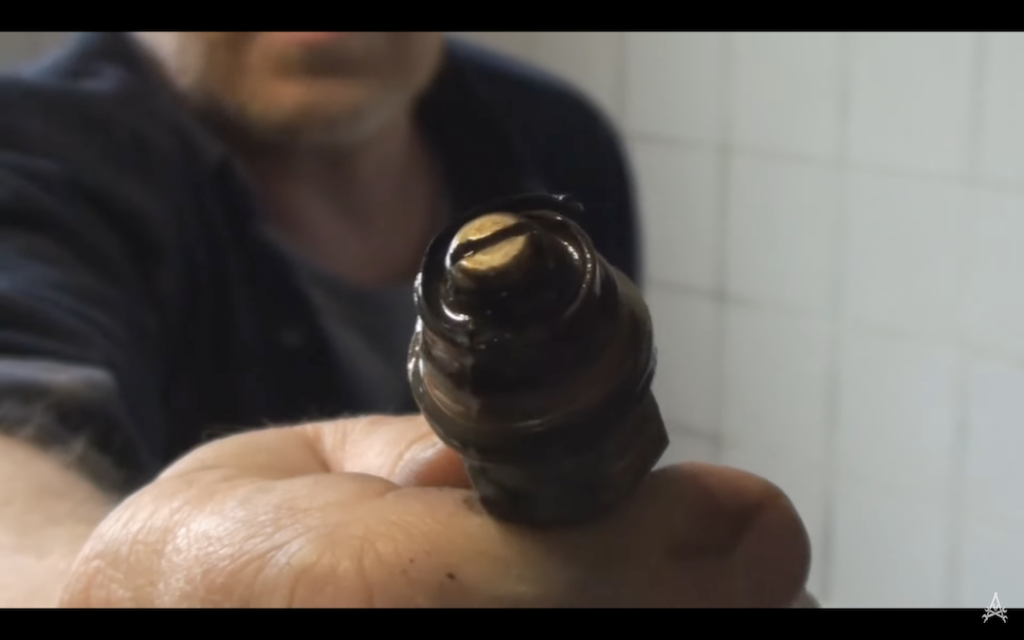
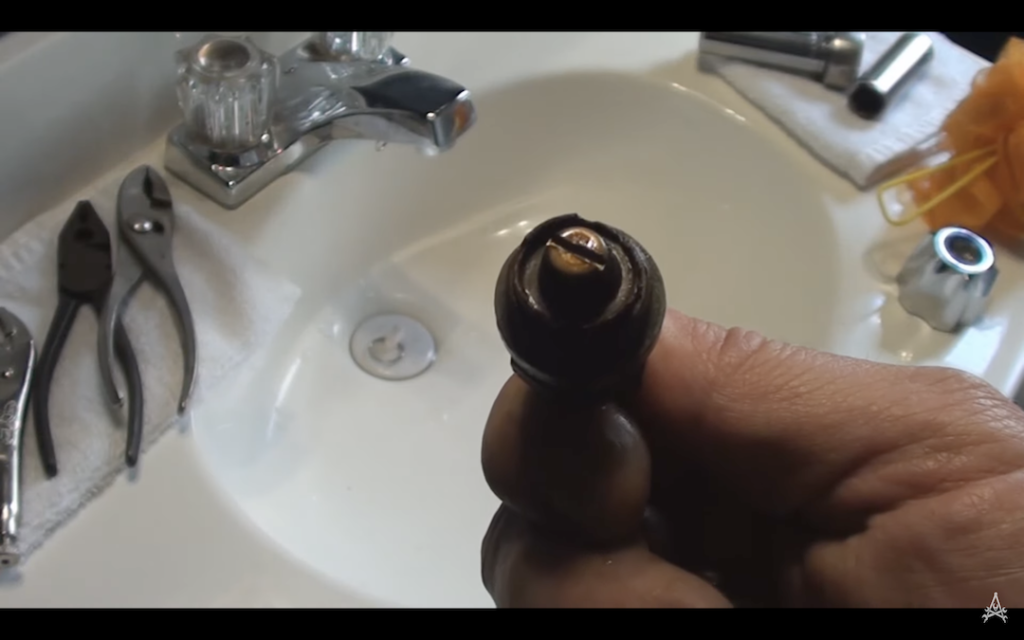
So I had to go into my socket wrench set and get a three quarter inch deep socket. And out she comes. And there you go. Focus? Oh yeah. What a mess, eh? OK you can see that that bushing is just about shredded. So no wonder it wasn’t holding water anymore. Now I’ll get the hot one out as well and I’ll show you how to rebuild them.
You see they come out real easy when you have the right tools.
OK this one is all but annihilated as you can see. The metal is starting to erode and there’s virtually no rubber left there at all.

OK so I’m just going to feel around very gently. Try not to cut myself. And see if I can see any reason why these bushings are self-destructing. Or if they’re just gone because of age. I can feel the valve seat with my fingertip and it does not feel particularly sharp. So I’m going to guess that those were just really old bushings. Let’s try the other one. OK we’re going to gently probe around in here a little bit. Again, I don’t feel anything particularly sharp but you can see the blackness on my fingertip. That’s the bushing deteriorated and making a deposit inside here.
OK I’m going to film right here over the sink because it really is the best lighting and the best background. But if you’re going to do something over the sink. Make sure you put the plug in because you really don’t want to lose any parts down there.
First thing is we’re going to undo that screw and pull off the bushing. You can see it comes out easy and the bushing is all but destroyed. Just in comparison, that’s our bushing that just came out, you can see the big crack in it. And that’s what a new bushing looks like. So I’ll just take the other one and also take that screw out and that bushing off. This bushing is in a little bit better shape than the first one. Anyway, off comes the screw, there you go, whoops. Out came the screw and there you go. There’s the bushing, it’s in a lot better shape than this one. Pull the screw out of it. As you can see, that’s our pair of bushings. It’s in a lot better shape than its brother.

We take our little dome shaped bushing, on the back it says quarter inch. So we just drop it in with the tapered side facing against the seat that it’s going to seal. And you simply install the retaining screw back in. Piece of cake.
Just do that down snug and we’re done. OK so we’ll just rebuild the other one. Snap it all back together and we’ll turn the water on and see if it doesn’t leak.
I’ve got my valve stems rebuilt and I’m ready to drop them back in. OK those are both down and I’m just going to snug the valve stems into the valve bodies. But I have to be very careful of course it’s only brass. So I’m choking up on the socket wrench like this in order to limit the amount of torque I can put on it.
The handle sits on this splined end of the valve stem. And there’s a female splined plastic piece on the inside of the handle to receive it. So you just need to line it up and it pops right into place. As you heard, and then we go back in with that old screw and just wind it in. You know you’re tight when the handle starts turning with the screw. OK so that’s nice and tight and just nice and easy there I can feel the nice seal with the new rubber. Now you don’t want to overdo it because that’s what shredding up these seals in the first place. So I’ll move over to the hot side…

OK the water’s back on.
And hot. Hot water coming out already.
As you can see and hear, our drip is fixed.
OK so with just a little bit of my time… The right tools and a couple of these very inexpensive bushings – problem is solved. I was able to do something. That would have otherwise cost a couple of hundred dollars to have somebody else come in and do.
And that, of course, is the whole point behind this website. To help you do these kinds of repairs. Save yourself some money. Save the environment by not having to throw things out, by repairing them, by getting more use out of them.
Now I can address this rust stain at the bottom of the tub. As well as this little cement spot here where the paint didn’t stick.