
Today on Repairs101 I’d like to share with you some tips on performing your own engine oil changes.

What you need
So have a look at my other video “Choosing Engine Oil”. To help you determine exactly what kind of oil you want to put in your engine. So you can get your filter from your dealership. You can get it at a lot of different kinds of automotive supply stores and general department stores have them. Even Wal-Mart carries them. And of course if you don’t know what the number is. If you can’t read it say on the filter that’s on your vehicle right now. If you don’t have access to the manuals – you get some information at the store.
There’s generally going to be… At the very least… There’s going to be some flip-books attached to the shelving somehow where the filters are being sold. And in the best case scenario they’ll have a parts person there to help you out. They’ll just ask you a few basic questions about your car. What’s the make, the model, the year and the engine size. And they’ll be able to help you out right away, get you the right filter right away.
The lift
Perhaps have a look at one of my other videos “Safe Jacking Procedures”. To give you some ideas on exactly how to lift your vehicle. Carefully and safely and ensure that it’s safe before you get to work on it. So if you don’t have the time or the equipment to actually lift the car up you can try this “curb-hopping” technique. But if you do “curb-hopping” and you do your oil change out in the street. Please don’t work near a storm drain and do all that you can to catch all the oil and mop up any spills at all. Because we’ve had enough oil spills recently.
I worked at a place that would pull the dipstick and leave it standing up like that in order to signify that the oil had been dropped.

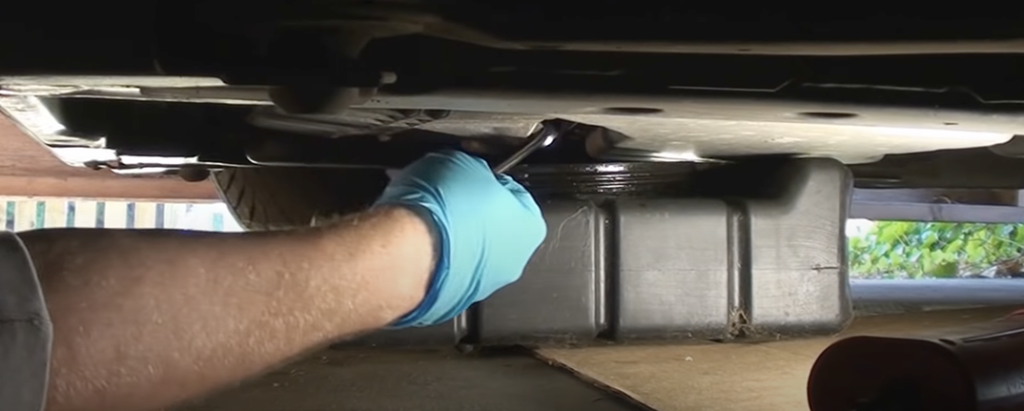
It’s a drain pan. You just screw the end off of here.
Tools
Do not use a pair of pliers or Vise-Grips or locking pliers, Channellocks or water-pump pliers, don’t use a pipe wrench, don’t use these kinds of tools. You can see the teeth on this, the steel is extremely hard and the teeth on it are very, very aggressive.
They’re going to chew up and round down the much softer metal of that drain plug. And they’re going to leave you with a rounded drain plug that you can’t remove except for to try filing it down a size using a hand-file, or welding a nut onto it. And don’t use an open ended wrench. Use the ring wrench end of your combination wrench to do the job. A combination wrench is very simply a combination of an open ender wrench and a ring wrench, it’s a combination. Definitely do use a combination wrench or a line wrench or a recess wrench or a gear wrench or your favourite socket wrench.
I’ll just get in here. Put the ring end of a combination wrench and just break it like that, bring this back under it, and then spin it off with my fingers. It’s very tight here, as you can see, but I didn’t jack the car up at all. We’re working on it on its own wheels. So this is its natural height.
“Tighten the engine oil drain plug to twenty-two foot pounds”. OK now that the oil pan nut is back in place. I’m going to drag the drain pan ahead a little bit. To capture any oil that gets away when I remove the oil filter.
Oil filter

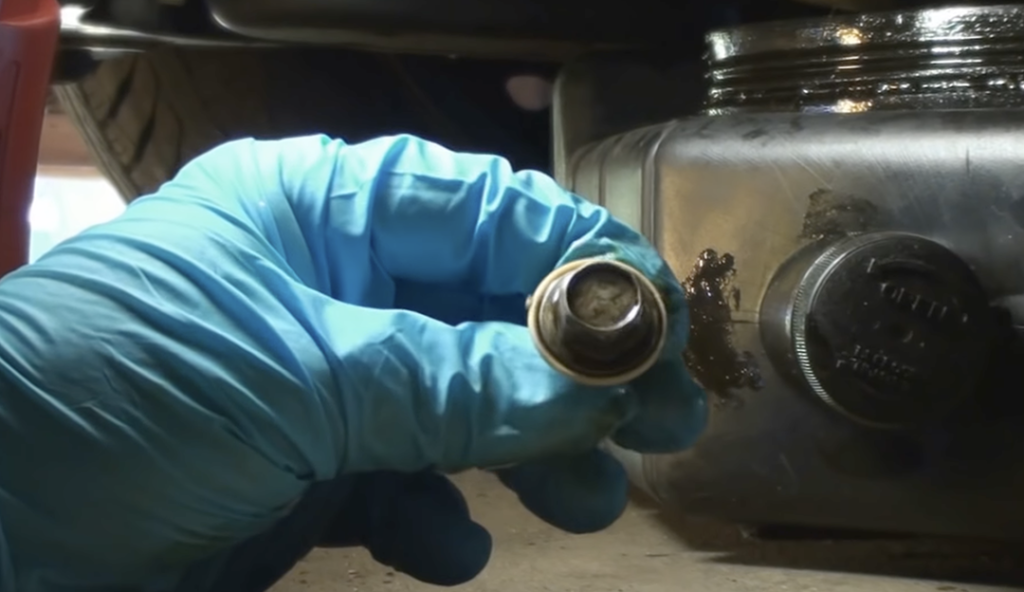
This is an oil filter wrench – this is for very large sized oil filters. This is a moderate sized one for car engines and light trucks. By far the most useful is the strap wrench. If you’re wondering if you have to do a filter change every time you do an oil change the answer is “no”. The service manual says that you can get away with doing an oil change every other time. And an oil/filter change every other time. I personally have always done oil and filter changes together. I would never do an oil change without a filter change. Because you know filters are relatively cheap compared to engines. I’ve shown you the proper tools to use but in this case it’s just a small one. And I know from experience that I can do it with my bare hand.

Recycle
So transfer it into some kind of sealing bottle and take it either to a garage. Or a marina or some kind of service centre. Even the place that sold you the oil should have some kind of recycling program. Where they can take it from you at no charge to you.
OK now it’s of critical importance that you lubricate this gasket before you put it on. And that you check that the old gasket is still in place. Because if you have the old gasket stuck to the face of your engine… And you try and put a new gasket on… The two gaskets won’t be able to hold the oil in. And it’ll end up spraying it all over and out onto the road. Take a little bit of this old oil like that and just use it to lubricate the gasket before you install it. And that’ll ensure that it comes off easily when you go to change it again next time. Tighten the new oil filter to three-quarters to a full turn after it’s contacted the surface. And that’s it.

So you should consider this a range – not absolutes. It should lie somewhere between the low and the full mark. And if it is below the low mark then you definitely need to add oil. Perfect.


Things have changed
OK so do have a look at my channel. And when you’re there, just ski on down to the link here, click on that link. That’ll take you to my website. Go over here to the table of contents. Take the slider bar and scroll right down to the bottom, and the second-last link there is called Resources/Links.
This has all kinds of really great information links including a link to Automotive Literature.


